I want to just take a moment to thank everyone who has checked out the blog. I really appreciate all the shares and comments I have received! I also really appreciate the support and acknowledgement of the projects!
With all of the terrible things that have been going on with the burglary I just wanted to say all of the views and support. It really helped out with finishing these projects on time to create something amazing for people to see and recreate!
I will definitely try to keep up with crafts and DIYs. I still have a lot of ideas to share! Just not having a computer is a challenge.
Again thank you so much for the page views and support!
Friday, July 25, 2014
Wednesday, July 23, 2014
Easiest lack table diy!
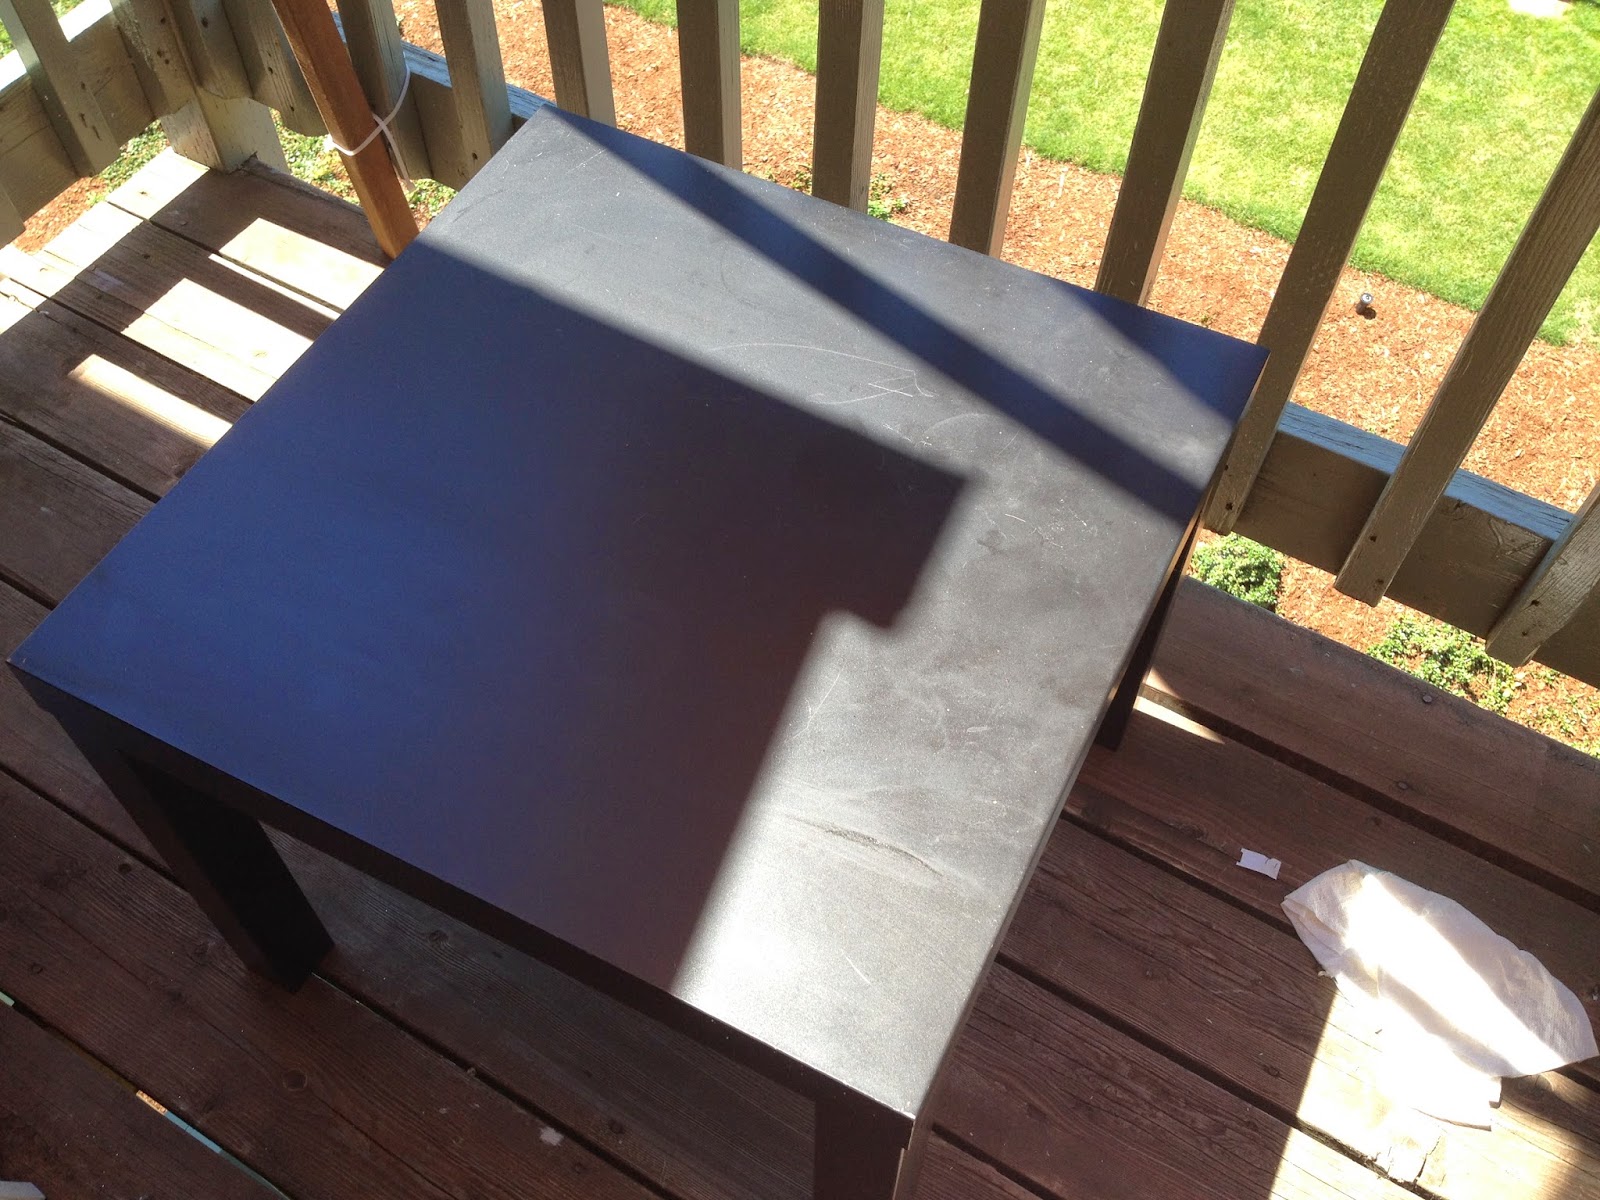.jpeg) I still have some random lack tables hanging out around my house, so I decided to spice it up instead of doing another ottoman piece. I was trying to think of something stylish, cheap and easy to do! So I immediately thought... chevron...
I still have some random lack tables hanging out around my house, so I decided to spice it up instead of doing another ottoman piece. I was trying to think of something stylish, cheap and easy to do! So I immediately thought... chevron...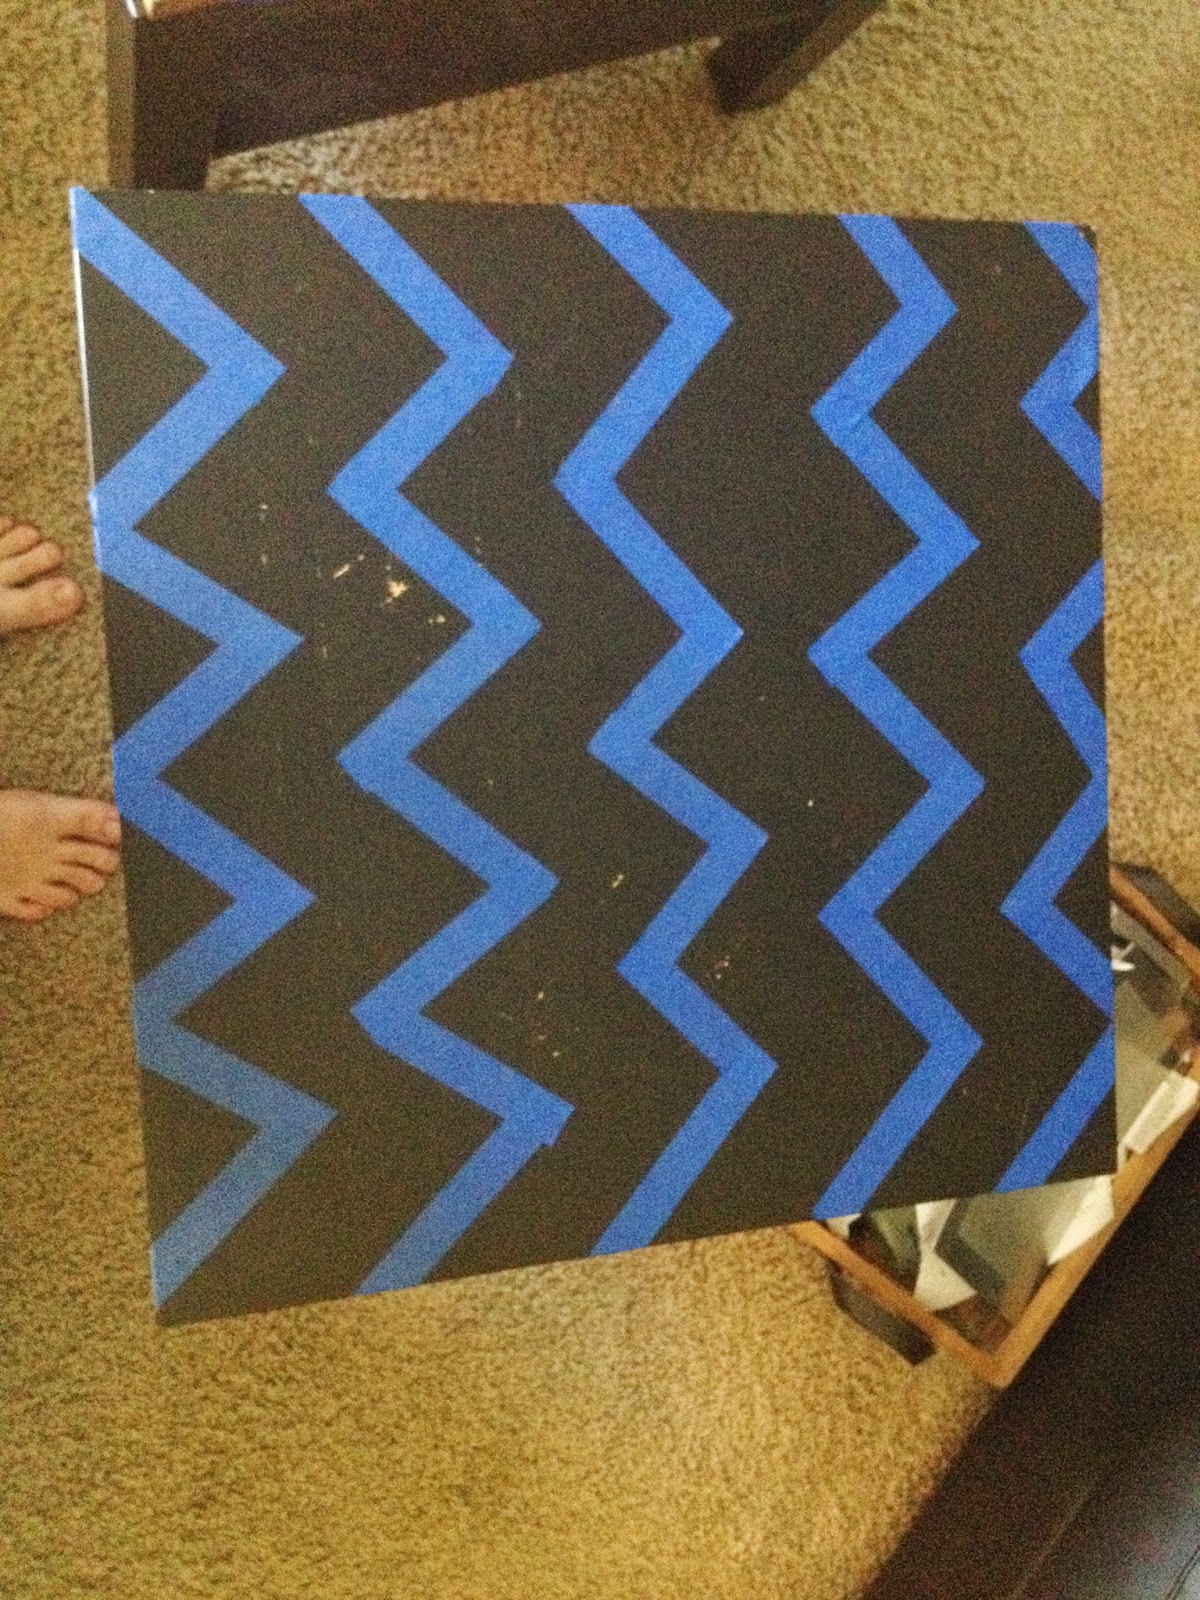 All you're going to need is a lack table, good painters tape and white paint! I used our primer that we had left over. But you can easily use a couple cans of spray paint as well!
Ignore Gabe's feet, but here are the stripes I created with the painters tape. I didn't make them perfectly even because I wanted make the table look a little worn (which it already was) and I wanted to have it look rustic and modern to match the living room feel.

 I did two or three coats of the primer so it would come out very white; to have a high contrast. During this stage I realized that I should have made the stripes thinner and more of them!
 The table after the fact actually still looks really good, and looks nice right next to the ikea klippan couch!
Money break down:
Lack tables (buy used from craigslist) or new for less than $8
Spray paint runs about $5 (you might need two cans)
And the painters tape was about $3
This project took less than two hours and costs less than $15!
Now the best time of the day........
.jpeg)
Thursday, July 17, 2014
Malm dresser hack! and it turned out unbelievably great!
.jpeg) As we all know, again and again I browse craigslist... Well last week I picked up a FREE pink ikea dresser........ ;)
As we all know, again and again I browse craigslist... Well last week I picked up a FREE pink ikea dresser........ ;)You can't see how pink it was in this picture, but it was a little outrageous.

So we start with primer..
We did 2 coats of primer in preparation for our grey paint.
*HUGE NOTE. Do not paint in the sun, we painted this dresser before we had the shade awning on our back porch. Well, the heat and the sun caused the paint to dry completely deformed, so the top of the dresser looks odd in the final project. Paint in the shade, do not paint in the sun.

 You gotta watch out for drips! Gabe's side of the dresser is full of drips... -_-
After we let the dresser completely dry, we measured where we wanted to put the knobs! I debated adding this hardware! But it ended up costing tooo much. Like $30 per outline. So I stuck with knobs!


There is a missing top part, above the top drawer. Hence why the dresser was free. But for right now, it's all good. Ideally I should have spaced the knobs out more, but it's okay for a dresser that cost less than $50 and is custom made!
Costs of Ikea Malm Dresser Hack:
Primer was about $10
Paint was $14.99
Knobs cost..... way too much, but added a lot of character at $21
It took a couple of days in dry time, but over all this could be a two day project.
AND MORE BEANNNNNNNNN!!!

This Evangeline at 12 weeks old!
Ikea lack coffee table diy!


I decided to reuse the stain that I had bought for the Louisiana love art. I measured out the table and found four boards that equaled 24" wide and 35.5" long. *fun fact lowes and home depot have a section where they can cut your wood for you to the exact size you need! FOR FREE. No coupons needed.

I did two coats of stain this time, and let them set. But I started to get a little anxious today and while the boards where still a little tacky I decided to glue them on to the table! Remember to choose which side of the board you would like as your display top! I chose the sides with the most character and knots.

I used a wood adhesive and a caulking gun. If you don't have a caulking gun, you can buy an adhesive that is in a tooth paste like container at your local hardware store. You're going to have to press on the boards a little bit to get them to stick, so I recommend you let your boards dry a little more. Or you can glue the boards first and then stain them!

Finish project turned out unbelievable, it is such a revamp of a $20 table!!
Here's a run down on the cost:
Ikea lack table $19.99
Wood glue $2.50
Boards about $10 or less (depends on boards)
Stain(which I previously had) $4.95
And now..... Your daily dose of EVANGELINE.
 She is hiding under a rug...
Wednesday, July 16, 2014
Adding privacy to your back deck!
 My back deck is extremely large, anndd extremely in everyone's view. There is absolutely no privacy from the kids play ground, pool and BBQ area. So we needed a solution for this problem!
But we came across some problems.. It should have been as easy as screwing in the screen to the wood on the roof. Buutttt, we couldn't use screws.. well we could have but, we aint suppose ta. Plus, it was a metal gutters that we couldn't screw into. Also, our roof did not extend to the end of the patio. It stopped half way through. So a couple of obstacles that we eventually overcame!

We bought some screws and these perfect brackets, which was cheap and oh so easy.
 We bought three boards and 2 brackets, some screws and zip ties!! Because we cant screw the boards to the deck.
We have an ikea drill... and we need to invest in a new one. But for small projects and $15 this drill works pretty dang awesome!
This is the boards all put together and standing up at the edge of the patio!
Next we secured the boards with zip ties!


 We put them straight up, only to discover that the blinds did not cover the area we needed it to, and it just looked short and silly.
So we slanted the poles.
Then we used existing nails in the ceiling and some zip ties chained together to create a secure holding for the shade.
If you don't want to use zip ties you can just use the screw packet that comes with the shades.
 This whole project cost about $35. and totally worth it to get people to stop staring into my living room!!
Plus when I get into decorating the back deck all cajun-afied, it will definitely look really cool.
.jpeg)
Sometimes Evangeline anger cuddles me. She is not a happy cat..
Friday, July 11, 2014
Failed attempt at painting bottles
.jpeg) Welp, we finally had a project that turned out like complete crap, but really it was all my fault anyways. I went to michaels and picked up some paint for $0.59 plus coupons ;)
Welp, we finally had a project that turned out like complete crap, but really it was all my fault anyways. I went to michaels and picked up some paint for $0.59 plus coupons ;)I have been collecting unique bottles from our bar at work, just to do this project. I've got some pretty cool ones so far!
.jpeg)
We squeezed some paint on the inside of the bottles and just moved them around to cover the interior of the bottle. But as you can see in the picture to the right, the bottles were wet on the inside from the dishwasher*
*I put the bottles in the dishwasher to remove the labels, they get really warm in there and immediately after the cycle ends, the labels slip off. Then you use goo-be-gone to remove excess label glue.*

With the water being in the bottles mixed with the paint, the paint basically ran out of all the bottles.
Not to mention, my terrible cat knocked over two of the bottles and got paint ALL OVER my back deck. Which luckily I can sand and re-stain, but it still sucked.

I decided to give up this idea and just spray paint the outside of the bottles.
.jpeg) I got a couple of different spray paint colors so it didn't all look the same.
I got a couple of different spray paint colors so it didn't all look the same..jpeg)
You can do paint on the inside of bottles, but make sure they are completely dry on the inside before you add the paint.

This project saved bean and I sooo much moneyyyyyyy on decorating!
We on that new new... except it is actually old.. really old..
.jpeg) You know how you can usually find some busted up piece of furniture on the side of the road with a "free" sign hanging on it? Those free signs are my jam. Free signs may be my second love next to Mr. Craig list. What you can do with a sand block and some paint!!
You know how you can usually find some busted up piece of furniture on the side of the road with a "free" sign hanging on it? Those free signs are my jam. Free signs may be my second love next to Mr. Craig list. What you can do with a sand block and some paint!!Well we were driving to get materials for the ottoman, we happened upon a glorious free sign! My roommate that just moved in didn't have a dresser. So obviously this was a perfect situation! The dresser was a little messed up, there was some kid scribbles and some dents here and there, but we went with it anyways.

So we went to michaels and picked up some spray paint stupidly we thought two cans a of spray paint would be enough....
Obviously we were wrong, and it looked like tottallllll crappppp. In hindsight I think we should have just gotten a red stain, that probably would have looked pretty great. But instead we went to lowes and got a tiny can of baha blast tacobell paint.
It took two coats of paint to cover up our spray paint mess up and to cover up the kid scribbles.

Gabe wanted to add some hawiian flowers to the dresser but didnt time for it before we moved in. Ideally we should ahve sanded down the dresser and cleaned it up a little better before painting as well.


So for $25, this free dresser got a brand new life instead of being used as fire wood! I think it looks pretty great and it is proof that a can of paint can do almost anything!

Evangeline wrapped up like a baby.
Subscribe to:
Posts (Atom)